EC2 Instances
Here you can find an overview of all EC2 instances connected to the AWS accounts imported in aewacs. Note that this will also display all instances managed by AWS Autoscaling groups itself, even though you can’t individually manage them.
To tell if you can manage an instance look for a lock at the end of the line. If an instance is locked aewacs can’t manage it. Instances started via autoscaling groups will always be locked, other instances need to be set to Active in the EC2 Instances overview in Domain settings to be unlocked.
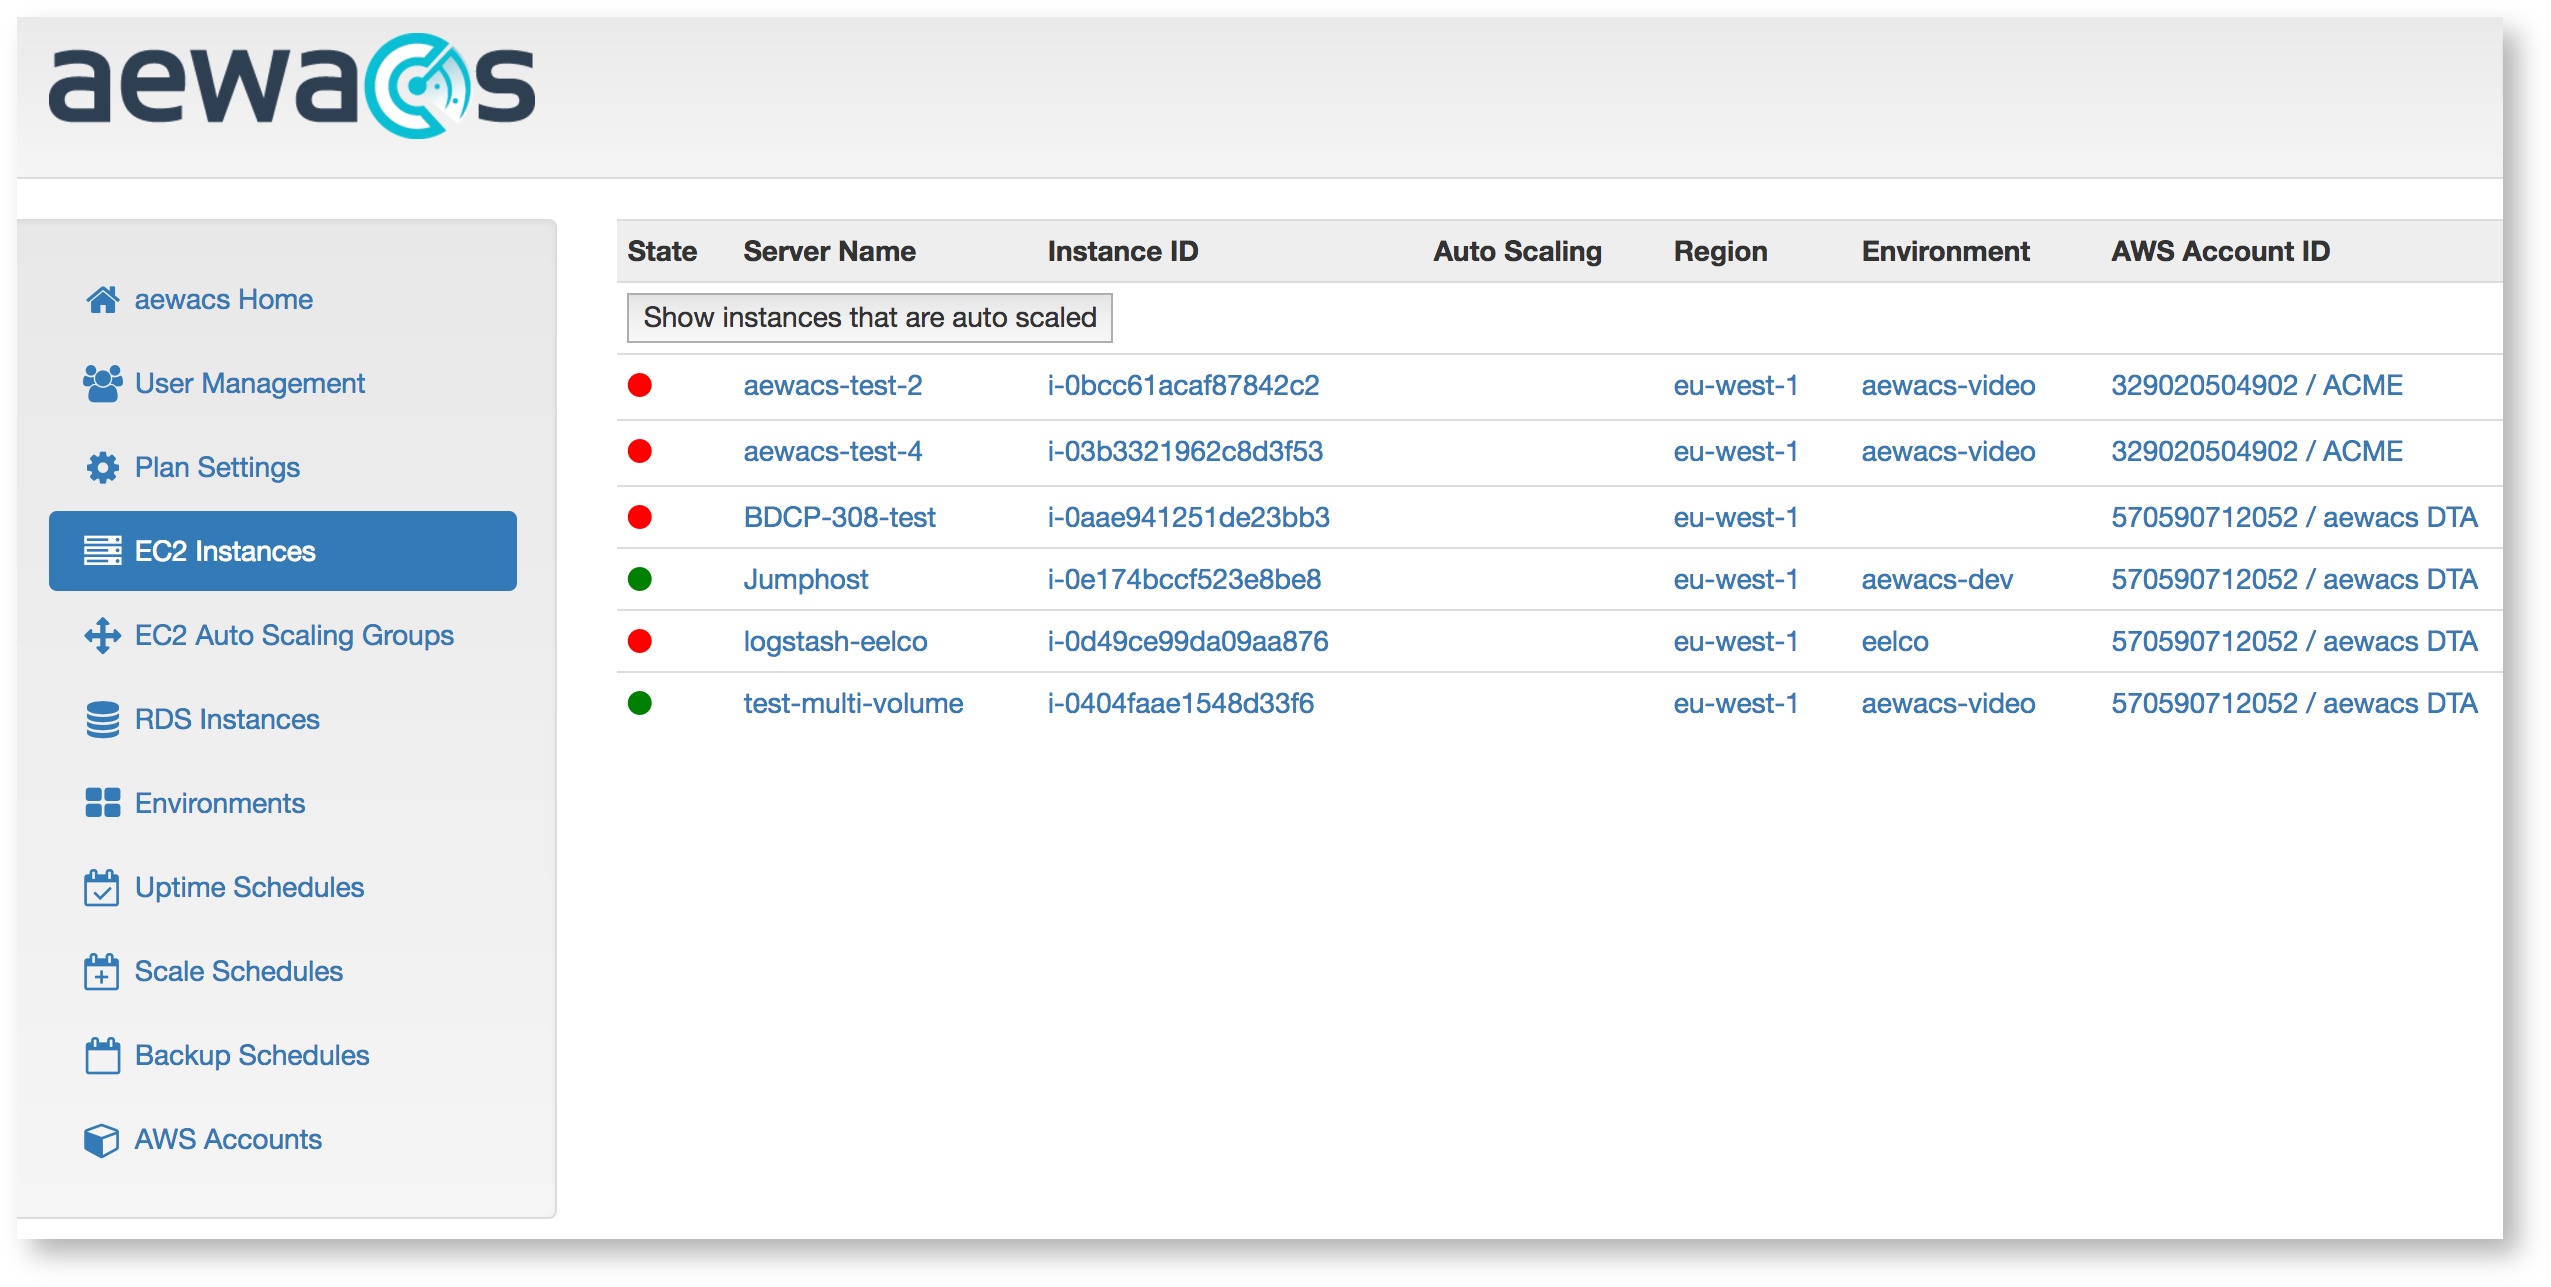
Also the following fields are populated by aewacs reading the tags added to an EC2 instance:
Server name: will be read from a tag with case insensitive key "name";
Environment: will be read from a case insensitive key “environment”.
Contact: will be read from case insensitive key "contact-person" or "contactperson";
For more on Environments see the Environment chapter in this manual.
Hide instances that are auto scaled
You might have an auto scaling group that's automatically scaling up and down your environment. These instances are transiant and usually not very useful to have around in aewacs. Using the 'hide instances that are auto scaled' button you can hide those instances.
Stop EC2 Instance
You can easily stop instances in aewacs, without going to the AWS console. Click the “Actions” button right next to the instance you want to stop. In the list that pops up select “Stop”.
aewacs will immediately send a stop request to amazon and your Instance will be stopped. It can take some time for the instance to be fully stopped however. You can always check the exact state your instance is in by using the Synchronize action, or just wait 10 minutes for aewacs to synchronize automatically.
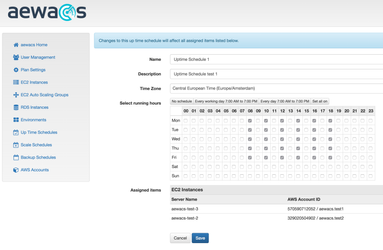
Edit Uptime Schedule
To add an Uptime schedule to a single instance, start by pressing the “Actions” button next to the instance. In here you can select an uptime schedule previously created (see Uptime Schedules), or you can select “New uptime schedule” which will let you create a new one.
In the list that pops up select “New Uptime Schedule”. This will bring you to a screen that looks like this:
Edit Backup Schedule
To add one or more backup schedules follow the instructions at Backup Schedules
As AMI
This option means that aewacs will create an AMI (Amazon Machine Image) containing a backup of ALL volumes.
As Snapshot
This means only the selected volumes will be backup up as individual snapshots. Please make sure to select at least 1 volume to create the snapshot of. Don’t forget to click save after selecting either option. Failing to do so will discard all changes.
Synchronize
To manually synchronize the state of an instance in aewacs, start by pressing the “Actions” button next to the instance. In the list that pops up select “Synchronize”. aewacs will start synchronizing in the back so you can continue using aewacs.
Related articles
(C) Copyright inQdo B.V. 2017