Environments in aewacs are a powerful tool in aewacs to easily group multiple instances and auto. These environments can even be used cross accounts, to make managing instances really easy.
To use environments you need to set an Environment tag to the instances you want to add to an environment. You can add a tag by following this guide provided by Amazon: http://docs.aws.amazon.com/AWSEC2/latest/UserGuide/Using_Tags.html.
Please note that the tag name for environments needs to be: “Environment”. The name of the tag is case insensitive, but the value of the tag IS Case Sensitive.So , so “Prod” and “PROD” are 2 different environments. After tagging your resources aewacs will automatically import the Environment tags and list them under the Environments menu.
<screenshot environments overview>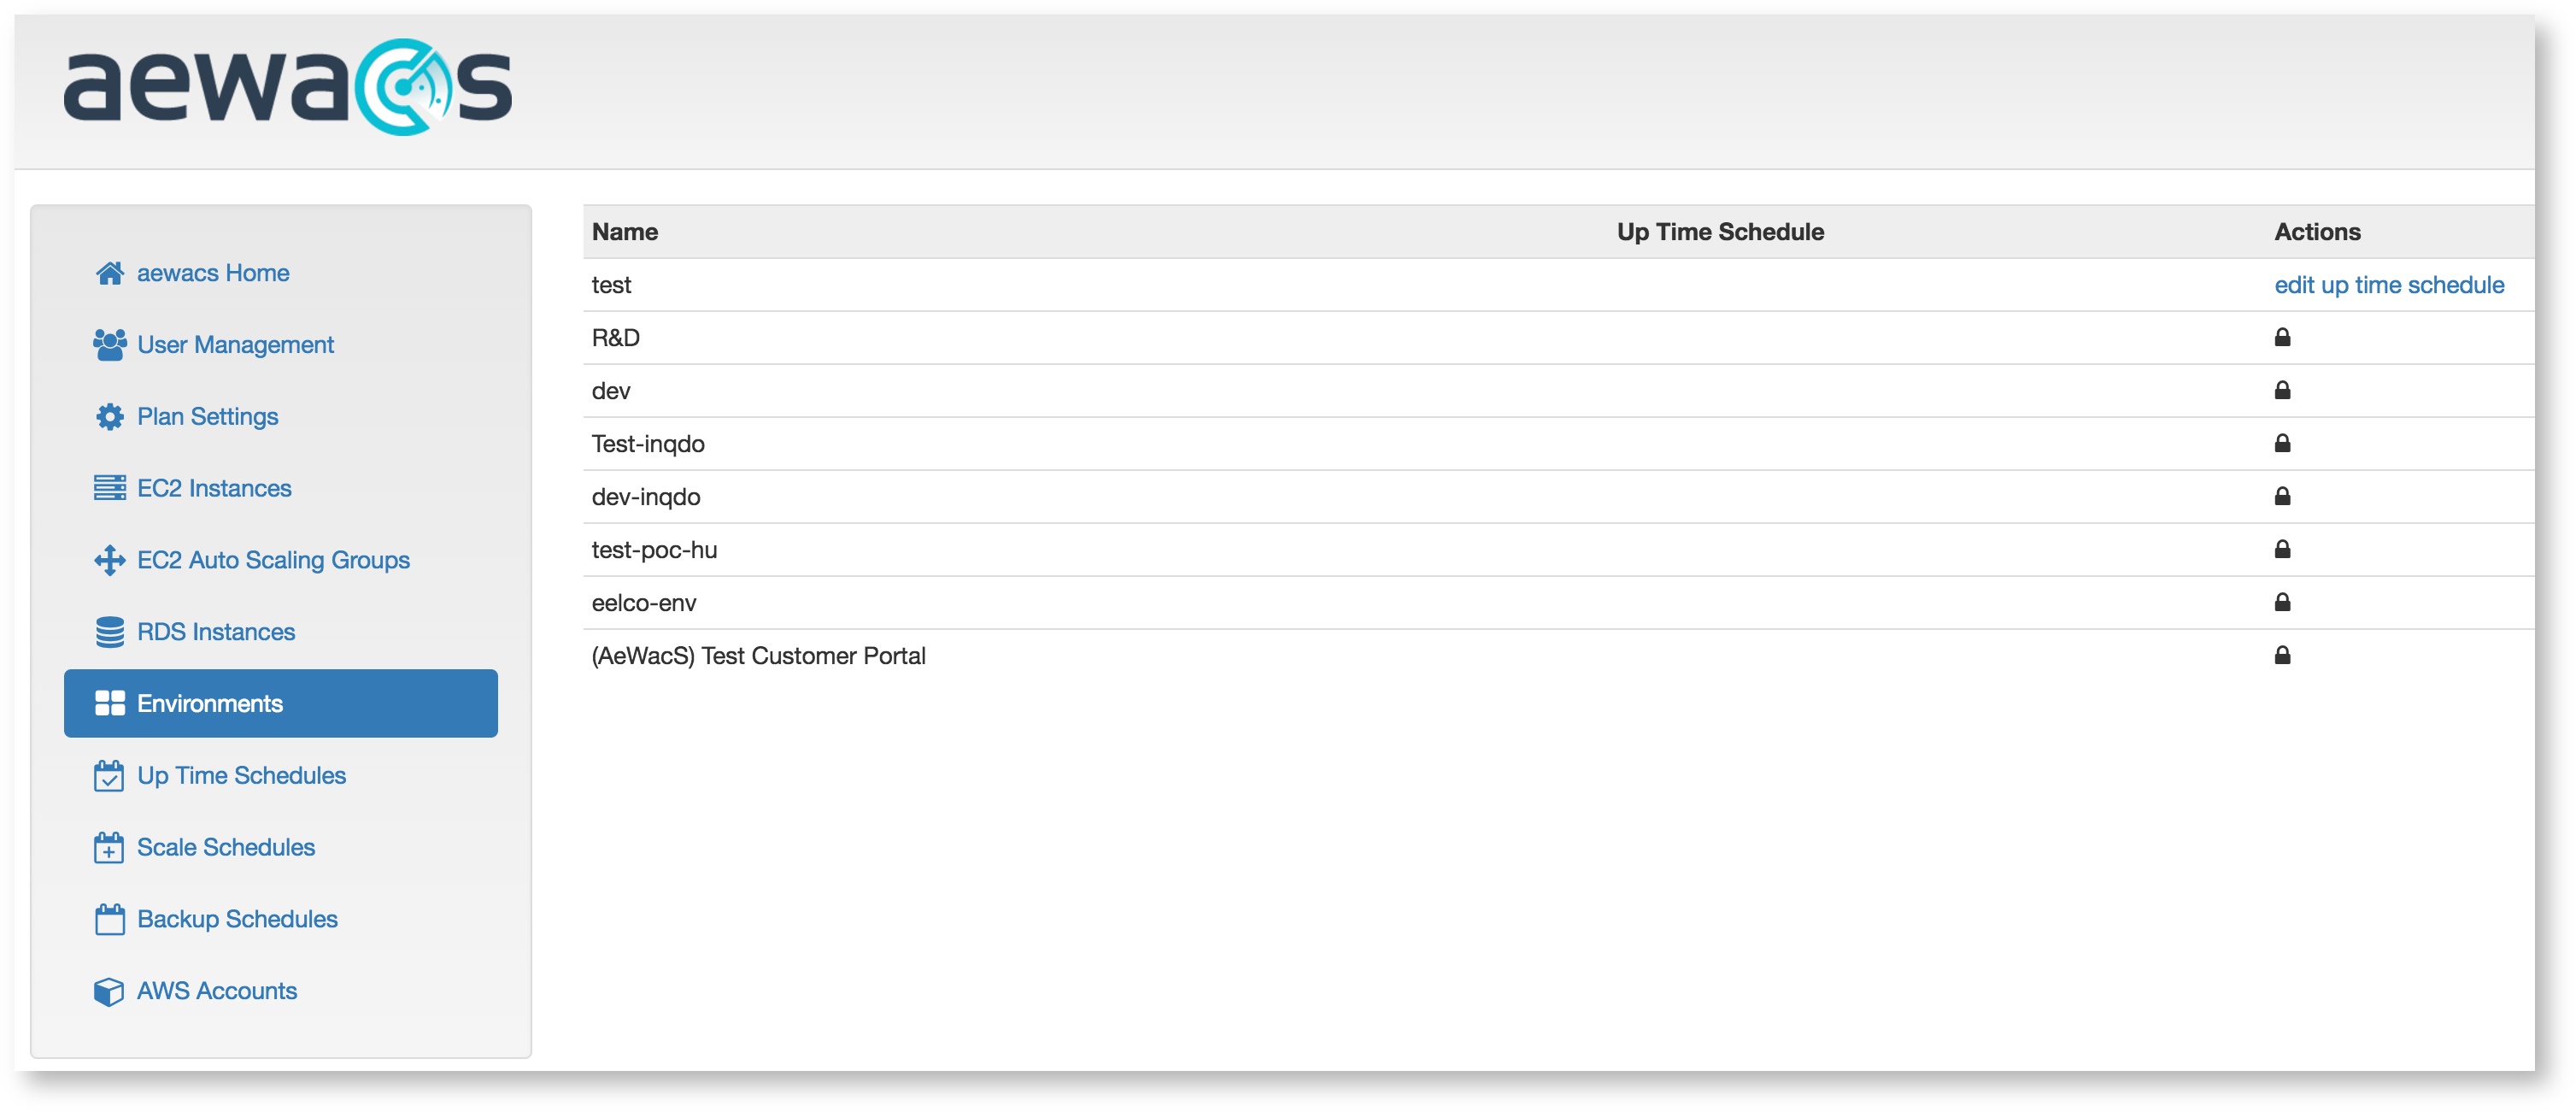
If you environments do not show up, even after manually synchronizing your account (see Synchronize account under AWS accounts), please make sure the tag name is spelled correctly.
...
This will bring you to a screen that looks like this:
<screenshot edit uptime schedule environments>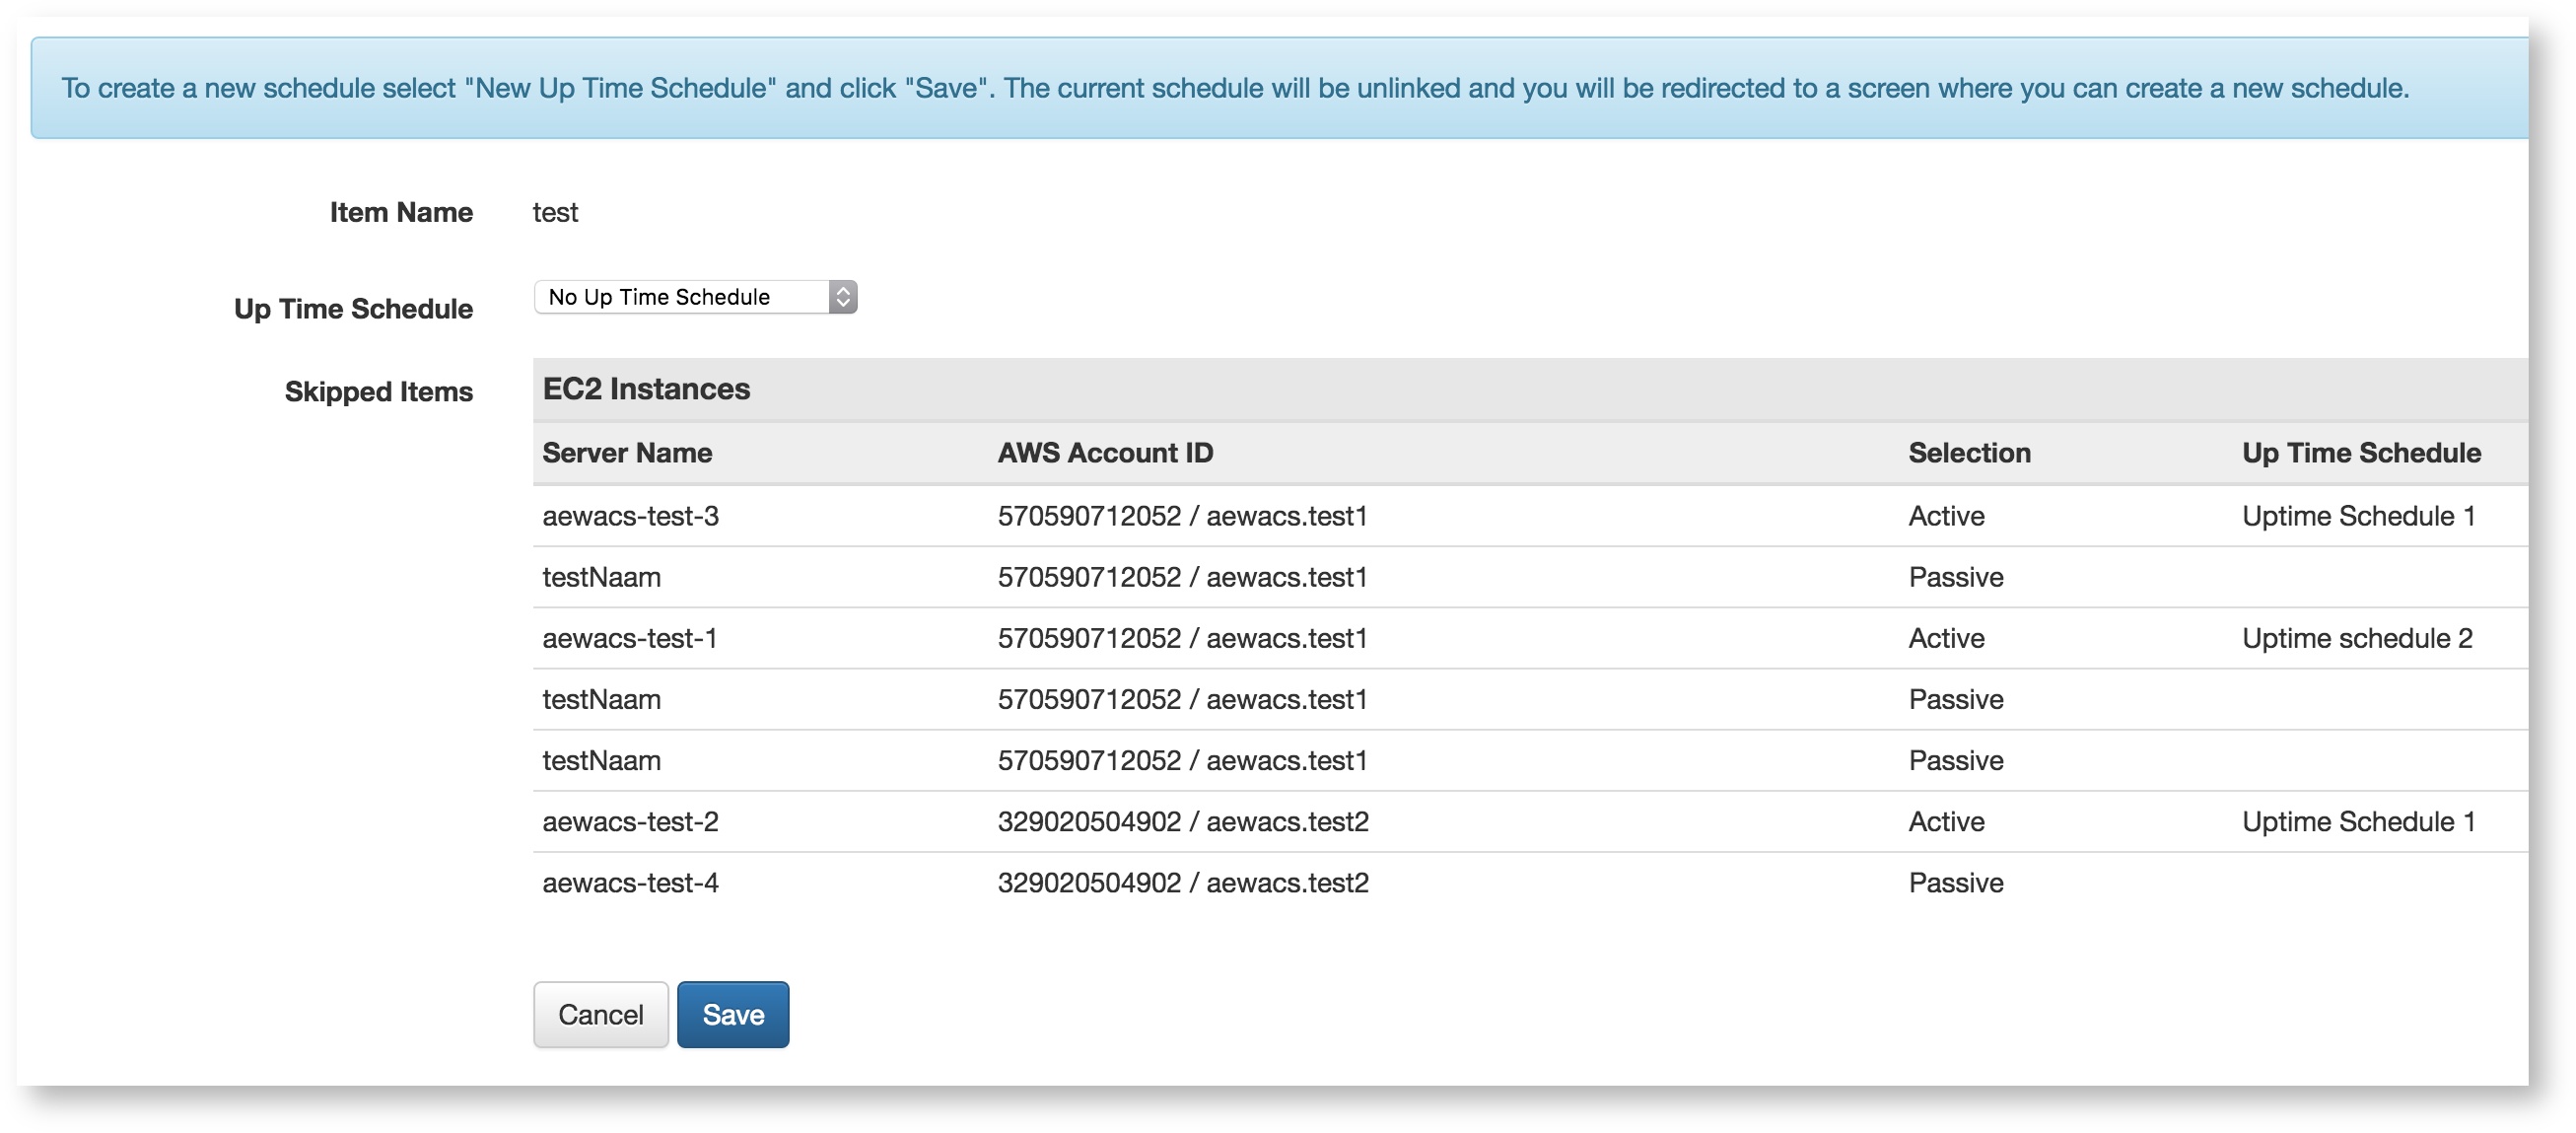
In here you can select an uptime schedule previously created (see Uptime Schedules), or you can select “New uptime schedule” which will let you create a new one. Also you can see all the resources connected to this environment. Resources connected to another uptime schedule or resources that are passive will be excluded from the uptime schedule linked to an environment.
| Info |
|---|
| Don’t forget to click save after selecting either option. Failing to do so will discard all changes. |
Related articles
| Filter by label (Content by label) | ||||||||||||||||||
|---|---|---|---|---|---|---|---|---|---|---|---|---|---|---|---|---|---|---|
|
...